etcd基于角色的权限控制
1. 概述
这是一个序列总结文档。
- 第1节 安装etcd 中,在CentOS7上面安装etcd。
- 第2节 单节点运行etcd 在单节点上面运行etcd。
- 第3节 三节点部署etcd集群 在三节点上面部署etcd集群,并为etcd配置了一些快捷命令。
- 第4节 etcd TLS集群部署 在三节点上面部署etcd集群,并开启TLS协议的加密通讯。
- 第5节 etcd角色权限控制 在三节点上面部署etcd TLS集群的基础上,开启角色控制。详细可参考 https://etcd.io/docs/v3.5/demo/ 。
1.1 VirtualBox虚拟机信息记录
学习etcd时,使用以下几个虚拟机:
| 序号 | 虚拟机 | 主机名 | IP | CPU | 内存 | 说明 |
|---|---|---|---|---|---|---|
| 1 | ansible-master | ansible | 192.168.56.120 | 2核 | 4G | Ansible控制节点 |
| 2 | ansible-node1 | etcd-node1 | 192.168.56.121 | 2核 | 2G | Ansible工作节点1 |
| 3 | ansible-node2 | etcd-node2 | 192.168.56.122 | 2核 | 2G | Ansible工作节点2 |
| 4 | ansible-node3 | etcd-node3 | 192.168.56.123 | 2核 | 2G | Ansible工作节点3 |
后面会编写使用ansible部署etcd集群的剧本。
操作系统说明:
[root@etcd-node1 ~]# cat /etc/centos-release
CentOS Linux release 7.9.2009 (Core)
[root@etcd-node1 ~]# hostname -I
192.168.56.121 10.0.3.15
[root@etcd-node1 ~]#2 etcd角色相关配置
我们在第4节 etcd TLS集群部署 在三节点上面部署etcd集群,并开启TLS协议的加密通讯。并设置了相关的快捷命令:
# ETCD相关快捷命令
alias etcdctl='etcdctl --endpoints=$ENDPOINTS --cacert=/etc/etcd/ssl/ca.crt --cert=/etc/etcd/ssl/client.crt --key=/etc/etcd/ssl/client.key'
# 查看etcd集群成员信息
alias ecm='etcdClusterMember'
alias etcdClusterMember='etcdctl --write-out=table member list'
# 查看etcd集群状态信息
alias ecs='etcdClusterStatus'
alias etcdClusterStatus='etcdctl --write-out=table endpoint status'
# 查看etcd集群健康状态
alias ech='etcdClusterHealth'
alias etcdClusterHealth='etcdctl --write-out=table endpoint health'本节我们在此基础上开启角色认证。
2.1 查看认证状态
检查当前 etcd 集群的认证状态。默认情况下,认证是关闭的。 可通过以下命令查看:
etcdctl auth status注意,此处的etcdctl已经使用了快捷命令alias etcdctl='etcdctl --endpoints=$ENDPOINTS --cacert=/etc/etcd/ssl/ca.crt --cert=/etc/etcd/ssl/client.crt --key=/etc/etcd/ssl/client.key'。
在节点node1上查看:
[root@etcd-node1 ~]# etcdctl auth status
Authentication Status: false
AuthRevision: 1
[root@etcd-node1 ~]#输出结果为 false,表示认证未开启认证。
2.2 创建etcd root用户
可以参考etcdctl user的帮助信息:
[root@etcd-node1 ~]# etcdctl user --help
NAME:
        user - User related commands

USAGE:
        etcdctl user <subcommand> [flags]

API VERSION:
        3.5


COMMANDS:
        add             Adds a new user
        delete          Deletes a user
        get             Gets detailed information of a user
        grant-role      Grants a role to a user
        list            Lists all users
        passwd          Changes password of user
        revoke-role     Revokes a role from a user

OPTIONS:
  -h, --help[=false]    help for user

GLOBAL OPTIONS:
      --cacert=""                               verify certificates of TLS-enabled secure servers using this CA bundle
      --cert=""                                 identify secure client using this TLS certificate file
      --command-timeout=5s                      timeout for short running command (excluding dial timeout)
      --debug[=false]                           enable client-side debug logging
      --dial-timeout=2s                         dial timeout for client connections
  -d, --discovery-srv=""                        domain name to query for SRV records describing cluster endpoints
      --discovery-srv-name=""                   service name to query when using DNS discovery
      --endpoints=[127.0.0.1:2379]              gRPC endpoints
      --hex[=false]                             print byte strings as hex encoded strings
      --insecure-discovery[=true]               accept insecure SRV records describing cluster endpoints
      --insecure-skip-tls-verify[=false]        skip server certificate verification (CAUTION: this option should be enabled only for testing purposes)
      --insecure-transport[=true]               disable transport security for client connections
      --keepalive-time=2s                       keepalive time for client connections
      --keepalive-timeout=6s                    keepalive timeout for client connections
      --key=""                                  identify secure client using this TLS key file
      --password=""                             password for authentication (if this option is used, --user option shouldn't include password)
      --user=""                                 username[:password] for authentication (prompt if password is not supplied)
  -w, --write-out="simple"                      set the output format (fields, json, protobuf, simple, table)

[root@etcd-node1 ~]# etcdctl user add --help
NAME:
        user add - Adds a new user

USAGE:
        etcdctl user add <user name or user:password> [options] [flags]

OPTIONS:
  -h, --help[=false]            help for add
      --interactive[=true]      Read password from stdin instead of interactive terminal
      --new-user-password=""    Supply password from the command line flag
      --no-password[=false]     Create a user without password (CN based auth only)

GLOBAL OPTIONS:
      --cacert=""                               verify certificates of TLS-enabled secure servers using this CA bundle
      --cert=""                                 identify secure client using this TLS certificate file
      --command-timeout=5s                      timeout for short running command (excluding dial timeout)
      --debug[=false]                           enable client-side debug logging
      --dial-timeout=2s                         dial timeout for client connections
  -d, --discovery-srv=""                        domain name to query for SRV records describing cluster endpoints
      --discovery-srv-name=""                   service name to query when using DNS discovery
      --endpoints=[127.0.0.1:2379]              gRPC endpoints
      --hex[=false]                             print byte strings as hex encoded strings
      --insecure-discovery[=true]               accept insecure SRV records describing cluster endpoints
      --insecure-skip-tls-verify[=false]        skip server certificate verification (CAUTION: this option should be enabled only for testing purposes)
      --insecure-transport[=true]               disable transport security for client connections
      --keepalive-time=2s                       keepalive time for client connections
      --keepalive-timeout=6s                    keepalive timeout for client connections
      --key=""                                  identify secure client using this TLS key file
      --password=""                             password for authentication (if this option is used, --user option shouldn't include password)
      --user=""                                 username[:password] for authentication (prompt if password is not supplied)
  -w, --write-out="simple"                      set the output format (fields, json, protobuf, simple, table)

[root@etcd-node1 ~]#可以看到etcdctl user add支持以下参数:
--interactive[=true]Read password from stdin instead of interactive terminal 交互模式下获取密码--new-user-password=""Supply password from the command line flag 命令行模式下提供密码--no-password[=false]Create a user without password (CN based auth only) 创建用户时不提供密码
我们在测试阶段,可以直接命令行设置密码:
[root@etcd-node1 ~]# etcdctl user add root --interactive=false --new-user-password="securePassword"
User root created
[root@etcd-node1 ~]#这个时候表示etcd集群认证中root用户已经创建成功,并设置密码为securePassword,实际生产设置时请注意密码保密。
2.3 查看用户列表
执行etcdctl user list即可。
[root@etcd-node1 ~]# etcdctl user list
root
[root@etcd-node1 ~]#2.4 创建root角色
使用etcdctl role --help查看角色相关命令。
root
[root@etcd-node1 ~]# etcdctl role --help
NAME:
        role - Role related commands

USAGE:
        etcdctl role <subcommand> [flags]

API VERSION:
        3.5


COMMANDS:
        add                     Adds a new role
        delete                  Deletes a role
        get                     Gets detailed information of a role
        grant-permission        Grants a key to a role
        list                    Lists all roles
        revoke-permission       Revokes a key from a role

OPTIONS:
  -h, --help[=false]    help for role

GLOBAL OPTIONS:
      --cacert=""                               verify certificates of TLS-enabled secure servers using this CA bundle
      --cert=""                                 identify secure client using this TLS certificate file
      --command-timeout=5s                      timeout for short running command (excluding dial timeout)
      --debug[=false]                           enable client-side debug logging
      --dial-timeout=2s                         dial timeout for client connections
  -d, --discovery-srv=""                        domain name to query for SRV records describing cluster endpoints
      --discovery-srv-name=""                   service name to query when using DNS discovery
      --endpoints=[127.0.0.1:2379]              gRPC endpoints
      --hex[=false]                             print byte strings as hex encoded strings
      --insecure-discovery[=true]               accept insecure SRV records describing cluster endpoints
      --insecure-skip-tls-verify[=false]        skip server certificate verification (CAUTION: this option should be enabled only for testing purposes)
      --insecure-transport[=true]               disable transport security for client connections
      --keepalive-time=2s                       keepalive time for client connections
      --keepalive-timeout=6s                    keepalive timeout for client connections
      --key=""                                  identify secure client using this TLS key file
      --password=""                             password for authentication (if this option is used, --user option shouldn't include password)
      --user=""                                 username[:password] for authentication (prompt if password is not supplied)
  -w, --write-out="simple"                      set the output format (fields, json, protobuf, simple, table)

[root@etcd-node1 ~]#

[root@etcd-node1 ~]# etcdctl role add --help
NAME:
        role add - Adds a new role

USAGE:
        etcdctl role add <role name> [flags]

OPTIONS:
  -h, --help[=false]    help for add

GLOBAL OPTIONS:
      --cacert=""                               verify certificates of TLS-enabled secure servers using this CA bundle
      --cert=""                                 identify secure client using this TLS certificate file
      --command-timeout=5s                      timeout for short running command (excluding dial timeout)
      --debug[=false]                           enable client-side debug logging
      --dial-timeout=2s                         dial timeout for client connections
  -d, --discovery-srv=""                        domain name to query for SRV records describing cluster endpoints
      --discovery-srv-name=""                   service name to query when using DNS discovery
      --endpoints=[127.0.0.1:2379]              gRPC endpoints
      --hex[=false]                             print byte strings as hex encoded strings
      --insecure-discovery[=true]               accept insecure SRV records describing cluster endpoints
      --insecure-skip-tls-verify[=false]        skip server certificate verification (CAUTION: this option should be enabled only for testing purposes)
      --insecure-transport[=true]               disable transport security for client connections
      --keepalive-time=2s                       keepalive time for client connections
      --keepalive-timeout=6s                    keepalive timeout for client connections
      --key=""                                  identify secure client using this TLS key file
      --password=""                             password for authentication (if this option is used, --user option shouldn't include password)
      --user=""                                 username[:password] for authentication (prompt if password is not supplied)
  -w, --write-out="simple"                      set the output format (fields, json, protobuf, simple, table)

[root@etcd-node1 ~]#查看当前角色信息:
[root@etcd-node1 ~]# etcdctl role list
[root@etcd-node1 ~]#可以看到默认是空,即未创建任何角色。
创建root角色:
[root@etcd-node1 ~]# etcdctl role add root
Role root created
[root@etcd-node1 ~]#再次查看角色列表:
[root@etcd-node1 ~]# etcdctl role list
root
[root@etcd-node1 ~]#也就可以确认root角色创建成功。
2.5 用户授予角色
使用etcdctl user grant-role --help查看向用户授予角色帮助信息。
[root@etcd-node1 ~]# etcdctl user grant-role --help
NAME:
        user grant-role - Grants a role to a user

USAGE:
        etcdctl user grant-role <user name> <role name> [flags]

OPTIONS:
  -h, --help[=false]    help for grant-role

GLOBAL OPTIONS:
      --cacert=""                               verify certificates of TLS-enabled secure servers using this CA bundle
      --cert=""                                 identify secure client using this TLS certificate file
      --command-timeout=5s                      timeout for short running command (excluding dial timeout)
      --debug[=false]                           enable client-side debug logging
      --dial-timeout=2s                         dial timeout for client connections
  -d, --discovery-srv=""                        domain name to query for SRV records describing cluster endpoints
      --discovery-srv-name=""                   service name to query when using DNS discovery
      --endpoints=[127.0.0.1:2379]              gRPC endpoints
      --hex[=false]                             print byte strings as hex encoded strings
      --insecure-discovery[=true]               accept insecure SRV records describing cluster endpoints
      --insecure-skip-tls-verify[=false]        skip server certificate verification (CAUTION: this option should be enabled only for testing purposes)
      --insecure-transport[=true]               disable transport security for client connections
      --keepalive-time=2s                       keepalive time for client connections
      --keepalive-timeout=6s                    keepalive timeout for client connections
      --key=""                                  identify secure client using this TLS key file
      --password=""                             password for authentication (if this option is used, --user option shouldn't include password)
      --user=""                                 username[:password] for authentication (prompt if password is not supplied)
  -w, --write-out="simple"                      set the output format (fields, json, protobuf, simple, table)

[root@etcd-node1 ~]#将root授予root角色:
[root@etcd-node1 ~]# etcdctl user grant-role root root
Role root is granted to user root
[root@etcd-node1 ~]#此时用户root已经授予了root角色。
2.6 查看用户详情
使用etcdctl user get命令则可以获取用户的详情。
如查看root用户的详情信息:
[root@etcd-node1 ~]# etcdctl user get root
User: root
Roles: root
[root@etcd-node1 ~]#可以看到root用户的角色中已经包含有root角色。
2.7 激活认证
- 使用
etcdctl auth enable来激活认证。 - 使用
etcdctl auth status查看认证状态。 - 使用
etcdctl auth disable来关闭认证。
[root@etcd-node1 ~]# etcdctl auth --help
NAME:
        auth - Enable or disable authentication

USAGE:
        etcdctl auth <enable or disable> [flags]

API VERSION:
        3.5


COMMANDS:
        disable Disables authentication
        enable  Enables authentication
        status  Returns authentication status

OPTIONS:
  -h, --help[=false]    help for auth

GLOBAL OPTIONS:
      --cacert=""                               verify certificates of TLS-enabled secure servers using this CA bundle
      --cert=""                                 identify secure client using this TLS certificate file
      --command-timeout=5s                      timeout for short running command (excluding dial timeout)
      --debug[=false]                           enable client-side debug logging
      --dial-timeout=2s                         dial timeout for client connections
  -d, --discovery-srv=""                        domain name to query for SRV records describing cluster endpoints
      --discovery-srv-name=""                   service name to query when using DNS discovery
      --endpoints=[127.0.0.1:2379]              gRPC endpoints
      --hex[=false]                             print byte strings as hex encoded strings
      --insecure-discovery[=true]               accept insecure SRV records describing cluster endpoints
      --insecure-skip-tls-verify[=false]        skip server certificate verification (CAUTION: this option should be enabled only for testing purposes)
      --insecure-transport[=true]               disable transport security for client connections
      --keepalive-time=2s                       keepalive time for client connections
      --keepalive-timeout=6s                    keepalive timeout for client connections
      --key=""                                  identify secure client using this TLS key file
      --password=""                             password for authentication (if this option is used, --user option shouldn't include password)
      --user=""                                 username[:password] for authentication (prompt if password is not supplied)
  -w, --write-out="simple"                      set the output format (fields, json, protobuf, simple, table)

[root@etcd-node1 ~]#激活认证:
[root@etcd-node1 ~]# etcdctl auth status
Authentication Status: false
AuthRevision: 4
[root@etcd-node1 ~]# etcdctl auth enable
Authentication Enabled
[root@etcd-node1 ~]#认证激活后,再执行命令则需要使用用户名和账号认证,不提供账号密码信息则会抛出异常:
[root@etcd-node1 ~]# etcdctl auth status
{"level":"warn","ts":"2025-04-13T10:32:02.380469+0800","logger":"etcd-client","caller":"v3@v3.5.18/retry_interceptor.go:63","msg":"retrying of unary invoker failed","target":"etcd-endpoints://0xc000036b40/192.168.56.121:2379","attempt":0,"error":"rpc error: code = FailedPrecondition desc = etcdserver: user name not found"}
Error: etcdserver: user name not found
[root@etcd-node1 ~]#激活认证后,带用户和密码执行etcd相关命令:
# 交互模式输入密码,查看认证状态信息
[root@etcd-node1 ~]# etcdctl --user root auth status
Password:
Authentication Status: true
AuthRevision: 4

# 非交互模式,在命令行直接提供密码参数,查看认证状态信息
[root@etcd-node1 ~]# etcdctl --user root --password securePassword auth status
Authentication Status: true
AuthRevision: 4
[root@etcd-node1 ~]#此时执行快捷命令也是需要提供用户账号和密码:
[root@etcd-node1 ~]# ech
{"level":"warn","ts":"2025-04-13T10:36:33.117805+0800","logger":"client","caller":"v3@v3.5.18/retry_interceptor.go:63","msg":"retrying of unary invoker failed","target":"etcd-endpoints://0xc0000363c0/192.168.56.121:2379","attempt":0,"error":"rpc error: code = PermissionDenied desc = etcdserver: permission denied"}
{"level":"warn","ts":"2025-04-13T10:36:33.118077+0800","logger":"client","caller":"v3@v3.5.18/retry_interceptor.go:63","msg":"retrying of unary invoker failed","target":"etcd-endpoints://0xc0000365a0/192.168.56.122:2379","attempt":0,"error":"rpc error: code = PermissionDenied desc = etcdserver: permission denied"}
{"level":"warn","ts":"2025-04-13T10:36:33.118284+0800","logger":"client","caller":"v3@v3.5.18/retry_interceptor.go:63","msg":"retrying of unary invoker failed","target":"etcd-endpoints://0xc00011a1e0/192.168.56.123:2379","attempt":0,"error":"rpc error: code = PermissionDenied desc = etcdserver: permission denied"}
+-----------------------------+--------+------------+-------+
|          ENDPOINT           | HEALTH |    TOOK    | ERROR |
+-----------------------------+--------+------------+-------+
| https://192.168.56.121:2379 |   true | 7.054328ms |       |
| https://192.168.56.122:2379 |   true | 7.130852ms |       |
| https://192.168.56.123:2379 |   true | 7.433969ms |       |
+-----------------------------+--------+------------+-------+
[root@etcd-node1 ~]# ech --user root --password securePassword
+-----------------------------+--------+------------+-------+
|          ENDPOINT           | HEALTH |    TOOK    | ERROR |
+-----------------------------+--------+------------+-------+
| https://192.168.56.123:2379 |   true | 1.383094ms |       |
| https://192.168.56.121:2379 |   true | 1.111019ms |       |
| https://192.168.56.122:2379 |   true | 2.182445ms |       |
+-----------------------------+--------+------------+-------+
[root@etcd-node1 ~]#3. 开启角色认证后为普通应用配置权限
通常情况下,可以针对不同的应用设置不同的键前缀,通过路径隔离不同应用的数据:
/apps/appA/设置为应用A的键的前缀。/apps/appB/设置为应用B的键的前缀。
然后为不同的应用创建应用角色和用户:
- 应用A创建角色
appA_role,授予角色对/apps/appA/路径的readwrite读写权限(包含子路径),创建用户appA_user。 - 应用B创建角色
appB_role,授予角色对/apps/appB/路径的readwrite读写权限(包含子路径),创建用户appB_user。
为不同应用设置只读角色和用户:
- 应用A创建角色
appA_readonly_role,授予角色对/apps/appA/路径的read读权限(包含子路径),创建用户appA_readonly_user。 - 应用B创建角色
appB_readonly_role,授予角色对/apps/appB/路径的read读权限(包含子路径),创建用户appB_readonly_user。
3.1 优化快捷命令
为了让我们在执行命令时更方便,并更关注权限相关的配置,我们优化一下快捷命令,之前未开始认证前的快捷命令是这样的:
[root@etcd-node1 ~]# alias|grep etcd
alias ech='etcdClusterHealth'
alias ecm='etcdClusterMember'
alias ecs='etcdClusterStatus'
alias etcdClusterHealth='etcdctl --write-out=table endpoint health'
alias etcdClusterMember='etcdctl --write-out=table member list'
alias etcdClusterStatus='etcdctl --write-out=table endpoint status'
alias etcdctl='etcdctl --endpoints=$ENDPOINTS --cacert=/etc/etcd/ssl/ca.crt --cert=/etc/etcd/ssl/client.crt --key=/etc/etcd/ssl/client.key'
[root@etcd-node1 ~]#为了每次都不输入--user root --password securePassword相关信息,对快捷命令进行了一些调整:
# 保留原来只设置有证书相关信息的etcdctl快捷命令
alias etcdctl='etcdctl --endpoints=$ENDPOINTS --cacert=/etc/etcd/ssl/ca.crt --cert=/etc/etcd/ssl/client.crt --key=/etc/etcd/ssl/client.key'

# 为传递有root账号认证和密码的命令设置新的快捷命令rootetcdctl,避免与应用用户传递用户和密码冲突
alias rootetcdctl='etcdctl --user root --password securePassword'

# 为集群健康、成员、状态设置快捷命令
alias etcdClusterHealth='rootetcdctl --write-out=table endpoint health'
alias etcdClusterMember='rootetcdctl --write-out=table member list'
alias etcdClusterStatus='rootetcdctl --write-out=table endpoint status'

alias ech='etcdClusterHealth'
alias ecm='etcdClusterMember'
alias ecs='etcdClusterStatus'然后使用source ~/.bashrc重新加载,使配置生效。
[root@etcd-node1 ~]# alias|grep etcd
alias ech='etcdClusterHealth'
alias ecm='etcdClusterMember'
alias ecs='etcdClusterStatus'
alias etcdClusterHealth='rootetcdctl --write-out=table endpoint health'
alias etcdClusterMember='rootetcdctl --write-out=table member list'
alias etcdClusterStatus='rootetcdctl --write-out=table endpoint status'
alias etcdctl='etcdctl --endpoints=$ENDPOINTS --cacert=/etc/etcd/ssl/ca.crt --cert=/etc/etcd/ssl/client.crt --key=/etc/etcd/ssl/client.key'
alias rootetcdctl='etcdctl --user root --password securePassword'
[root@etcd-node1 ~]# ech
+-----------------------------+--------+------------+-------+
|          ENDPOINT           | HEALTH |    TOOK    | ERROR |
+-----------------------------+--------+------------+-------+
| https://192.168.56.121:2379 |   true | 1.082928ms |       |
| https://192.168.56.123:2379 |   true | 1.177319ms |       |
| https://192.168.56.122:2379 |   true |  742.312µs |       |
+-----------------------------+--------+------------+-------+
[root@etcd-node1 ~]# ecm
+------------------+---------+-------+-----------------------------+-----------------------------+------------+
|        ID        | STATUS  | NAME  |         PEER ADDRS          |        CLIENT ADDRS         | IS LEARNER |
+------------------+---------+-------+-----------------------------+-----------------------------+------------+
| a7d7b09bf04ad21b | started | node3 | https://192.168.56.123:2380 | https://192.168.56.123:2379 |      false |
| d553b4da699c7263 | started | node2 | https://192.168.56.122:2380 | https://192.168.56.122:2379 |      false |
| e14cb1abc9daea5b | started | node1 | https://192.168.56.121:2380 | https://192.168.56.121:2379 |      false |
+------------------+---------+-------+-----------------------------+-----------------------------+------------+
[root@etcd-node1 ~]# ecs
+-----------------------------+------------------+---------+---------+-----------+------------+-----------+------------+--------------------+--------+
|          ENDPOINT           |        ID        | VERSION | DB SIZE | IS LEADER | IS LEARNER | RAFT TERM | RAFT INDEX | RAFT APPLIED INDEX | ERRORS |
+-----------------------------+------------------+---------+---------+-----------+------------+-----------+------------+--------------------+--------+
| https://192.168.56.121:2379 | e14cb1abc9daea5b |  3.5.18 |   20 kB |     false |      false |         9 |        338 |                338 |        |
| https://192.168.56.122:2379 | d553b4da699c7263 |  3.5.18 |   20 kB |      true |      false |         9 |        339 |                339 |        |
| https://192.168.56.123:2379 | a7d7b09bf04ad21b |  3.5.18 |   20 kB |     false |      false |         9 |        340 |                340 |        |
+-----------------------------+------------------+---------+---------+-----------+------------+-----------+------------+--------------------+--------+
[root@etcd-node1 ~]#生效后,再执行相关命令就不需要输入root用户的账号和密码。
3.2 应用A常规配置
3.2.1 为应用A创建用户和角色
需要执行以下命令:
# 创建角色
rootetcdctl role add appA_role

# 授予角色对/apps/appA/路径的读写权限(包含子路径)
rootetcdctl role grant-permission appA_role readwrite --prefix=true /apps/appA/

# 创建用户
rootetcdctl user add appA_user --interactive=false --new-user-password="securePassword"

# 将角色绑定到用户
rootetcdctl user grant-role appA_user appA_role实际执行过程:
# 创建角色
[root@etcd-node1 ~]# rootetcdctl role add appA_role
Role appA_role created

# 授予角色对/apps/appA/路径的读写权限(包含子路径)
[root@etcd-node1 ~]# rootetcdctl role grant-permission appA_role readwrite --prefix=true /apps/appA/
Role appA_role updated

# 创建用户,直接在命令行指定用户密码
[root@etcd-node1 ~]# rootetcdctl user add appA_user --interactive=false --new-user-password="securePassword"
User appA_user created

# 将角色绑定到用户
[root@etcd-node1 ~]# rootetcdctl user grant-role appA_user appA_role
Role appA_role is granted to user appA_user
[root@etcd-node1 ~]#3.2.2 应用访问etcd
应用在连接etcd时需使用对应用户的凭证。 需要带上用户名和密码信息:
etcdctl --user appA_user --password <password> put /apps/appA/key1 value1实际操作:
[root@etcd-node1 ~]# etcdctl --user appA_user --password "securePassword" put /apps/appA/key1 value1
OK3.2.3 测试授权是否生效
应用A用户应能读写/apps/appA/下的键,但无法访问其他路径:
etcdctl --user appA_user get /apps/appA/key1    # 应成功
etcdctl --user appA_user get /apps/appB/key1 # 应失败(无权限)实操如下:
# appA_user能成功读取到键/apps/appA/key1 的值
[root@etcd-node1 ~]# etcdctl --user appA_user --password "securePassword" get /apps/appA/key1
/apps/appA/key1
value1

# appA_user 不能 读取到键/apps/appB/key1 的值
[root@etcd-node1 ~]# etcdctl --user appA_user --password "securePassword" get /apps/appB/key1
{"level":"warn","ts":"2025-04-15T23:27:04.458027+0800","logger":"etcd-client","caller":"v3@v3.5.18/retry_interceptor.go:63","msg":"retrying of unary invoker failed","target":"etcd-endpoints://0xc0000363c0/192.168.56.121:2379","attempt":0,"error":"rpc error: code = PermissionDenied desc = etcdserver: permission denied"}
Error: etcdserver: permission denied
[root@etcd-node1 ~]#可以看到, 应用A用户能读写/apps/appA/下的键。再测试一下更新、删除、新建键操作:
# 查看当前/apps/appA/key1键的值,可以看到是value1
[root@etcd-node1 ~]# etcdctl --user appA_user --password "securePassword" get /apps/appA/key1
/apps/appA/key1
value1

# 更新/apps/appA/key1键的值为value2,可以看到返回OK说明更新成功
[root@etcd-node1 ~]# etcdctl --user appA_user --password "securePassword" put /apps/appA/key1 "value2"
OK

# 查看当前/apps/appA/key1键的值,可以看到是value2
[root@etcd-node1 ~]# etcdctl --user appA_user --password "securePassword" get /apps/appA/key1
/apps/appA/key1
value2

# 删除/apps/appA/key1键,返回1,表示删除成功
[root@etcd-node1 ~]# etcdctl --user appA_user --password "securePassword" del /apps/appA/key1
1

# 再次查看当前/apps/appA/key1键的值,因为键已经被删除了,查询不到对应的键,没有返回
[root@etcd-node1 ~]# etcdctl --user appA_user --password "securePassword" get /apps/appA/key1

# 重新新建/apps/appA/key1键,并设置值为value3
[root@etcd-node1 ~]# etcdctl --user appA_user --password "securePassword" put /apps/appA/key1 "value3"
OK

# 查看当前/apps/appA/key1键的值,可以看到是value3
[root@etcd-node1 ~]# etcdctl --user appA_user --password "securePassword" get /apps/appA/key1
/apps/appA/key1
value3
[root@etcd-node1 ~]#可以看到appA_user对/apps/appA/下的键具体创建、更新、删除等权限,说明权限配置是正确的。
3.3 为应用A创建只读账号
创建只读用户需要执行以下命令:
# 创建角色
rootetcdctl role add appA_readonly_role

# 授予角色对/apps/appA/路径的读权限(包含子路径)
rootetcdctl role grant-permission appA_readonly_role read --prefix=true /apps/appA/

# 创建用户
rootetcdctl user add appA_readonly_user --interactive=false --new-user-password="securePassword"

# 将角色绑定到用户
rootetcdctl user grant-role appA_readonly_user appA_readonly_role实际操作如下:
# 创建角色
[root@etcd-node1 ~]# rootetcdctl role add appA_readonly_role
Role appA_readonly_role created

# 授予角色对/apps/appA/路径的读权限(包含子路径),注意此处的权限是`read`,不是`readwrite`
[root@etcd-node1 ~]# rootetcdctl role grant-permission appA_readonly_role read --prefix=true /apps/appA/
Role appA_readonly_role updated

# 创建用户,直接在命令行指定用户密码
[root@etcd-node1 ~]# rootetcdctl user add appA_readonly_user --interactive=false --new-user-password="securePassword"
User appA_readonly_user created

# 将角色绑定到用户
[root@etcd-node1 ~]# rootetcdctl user grant-role appA_readonly_user appA_readonly_role
Role appA_readonly_role is granted to user appA_readonly_user
[root@etcd-node1 ~]#测试读写:
# 测试只读账号读应用A的键/apps/appA/key1,可以看到能够正常获取到值 value3,说明有读权限
[root@etcd-node1 ~]# etcdctl --user appA_readonly_user --password "securePassword" get /apps/appA/key1
/apps/appA/key1
value3

# 尝试put更新键/apps/appA/key1,提示权限拒绝,说明没有put权限
[root@etcd-node1 ~]# etcdctl --user appA_readonly_user --password "securePassword" put /apps/appA/key1 "value4"
{"level":"warn","ts":"2025-04-15T23:47:14.112336+0800","logger":"etcd-client","caller":"v3@v3.5.18/retry_interceptor.go:63","msg":"retrying of unary invoker failed","target":"etcd-endpoints://0xc0000343c0/192.168.56.121:2379","attempt":0,"error":"rpc error: code = PermissionDenied desc = etcdserver: permission denied"}
Error: etcdserver: permission denied

# 尝试del删除键/apps/appA/key1,提示权限拒绝,说明没有del删除权限
[root@etcd-node1 ~]# etcdctl --user appA_readonly_user --password "securePassword" del /apps/appA/key1
{"level":"warn","ts":"2025-04-15T23:47:29.134618+0800","logger":"etcd-client","caller":"v3@v3.5.18/retry_interceptor.go:63","msg":"retrying of unary invoker failed","target":"etcd-endpoints://0xc0003741e0/192.168.56.121:2379","attempt":0,"error":"rpc error: code = PermissionDenied desc = etcdserver: permission denied"}
Error: etcdserver: permission denied
[root@etcd-node1 ~]#也就是说appA_readonly_user只读用户只有/apps/appA/下面键的读权限,没有创建和删除权限。
在etcdkeeper界面尝试使用appA_readonly_user只读用户登陆后,然后修改/apps/appA/key1键的值,也会提示权限拒绝异常:
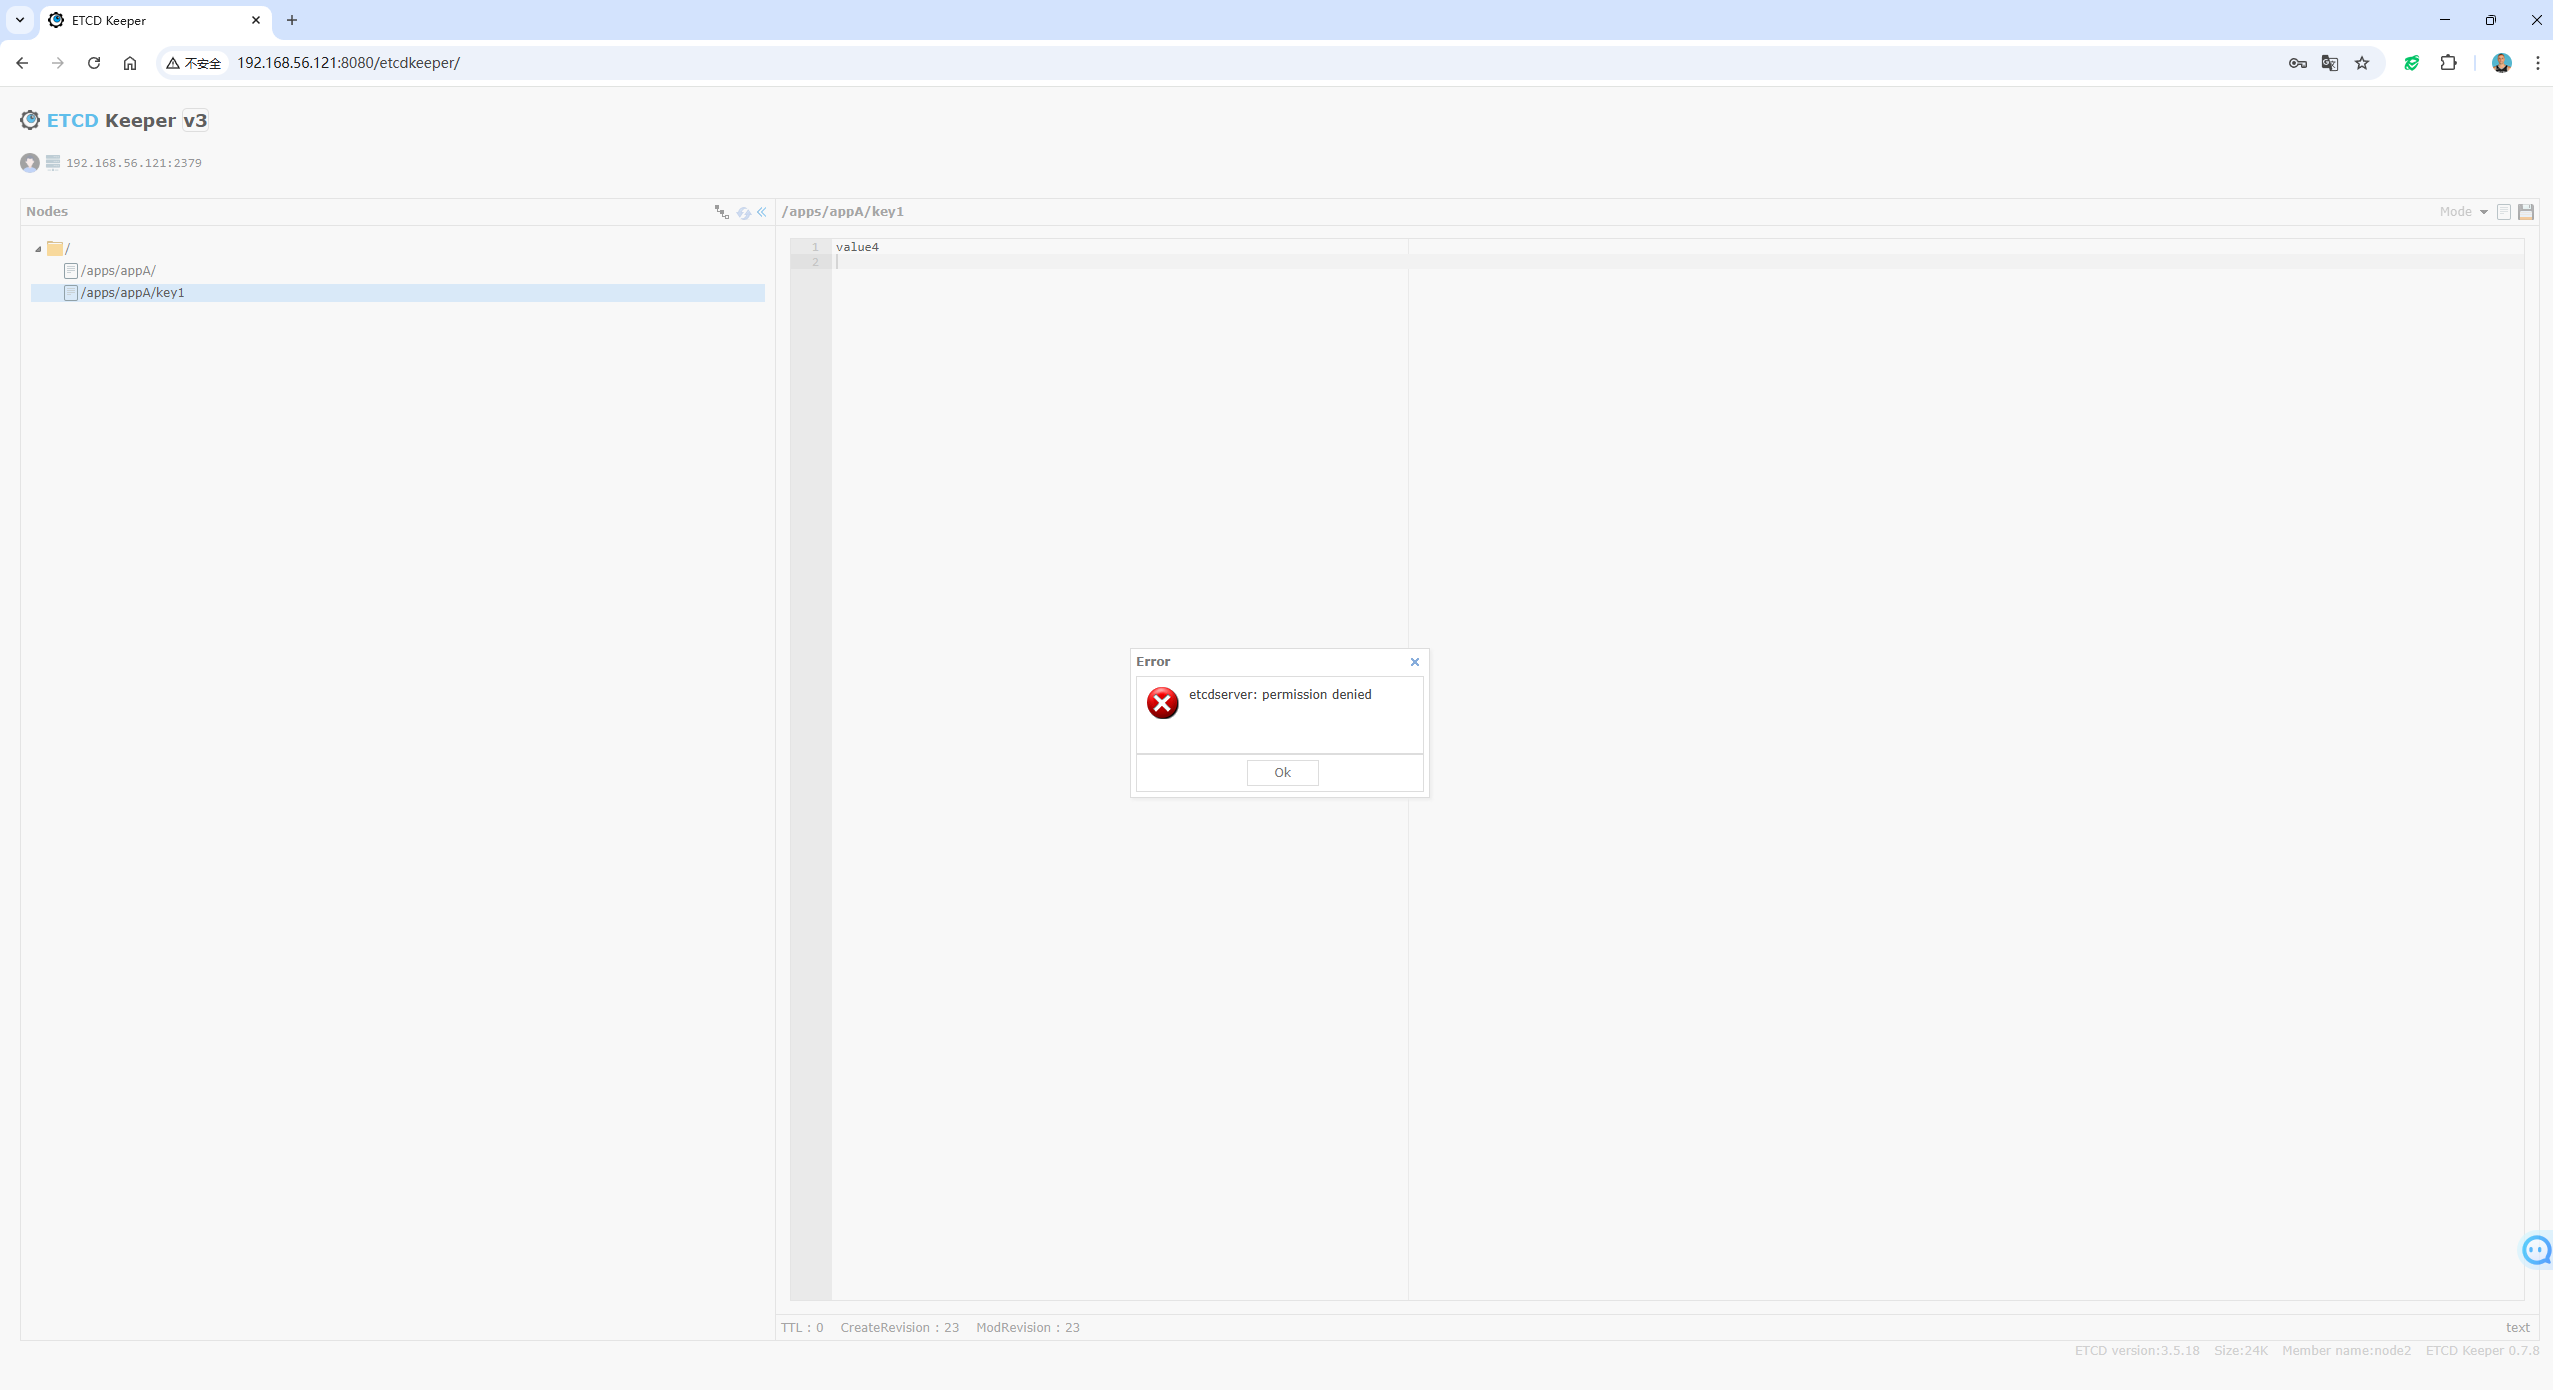
可以看到, 此时应用的只读权限也是配置好的!
4. 关键注意事项
- 路径隔离:确保不同应用的键前缀无重叠(如
/apps/appA/和/apps/appB/)。 - 最小权限原则:仅授予应用所需的最小权限(如只读或读写)。
- 启用TLS:结合TLS证书加固通信安全。
- 定期审计:检查用户和角色的权限分配。
通过以上步骤,即可在etcd中实现多应用的数据隔离与细粒度访问控制。
参考: