换个姿势学C语言 第8章 换个方式学图形编程
0. 说明
《换个姿势学C语言》由何旭辉 著,清华大学出版社2022年出版。感谢何老师!

这是一本非常不错的书!
8. 换个方式学图形编程
之前我们一直使用Visual Studio 2022,并且在华为RH1288v3二手2U机架式服务器端进行开发,但由于服务器开机实在太吵,最近懒得用服务器了。因此有了本篇总结文档。
8.1 工具依赖
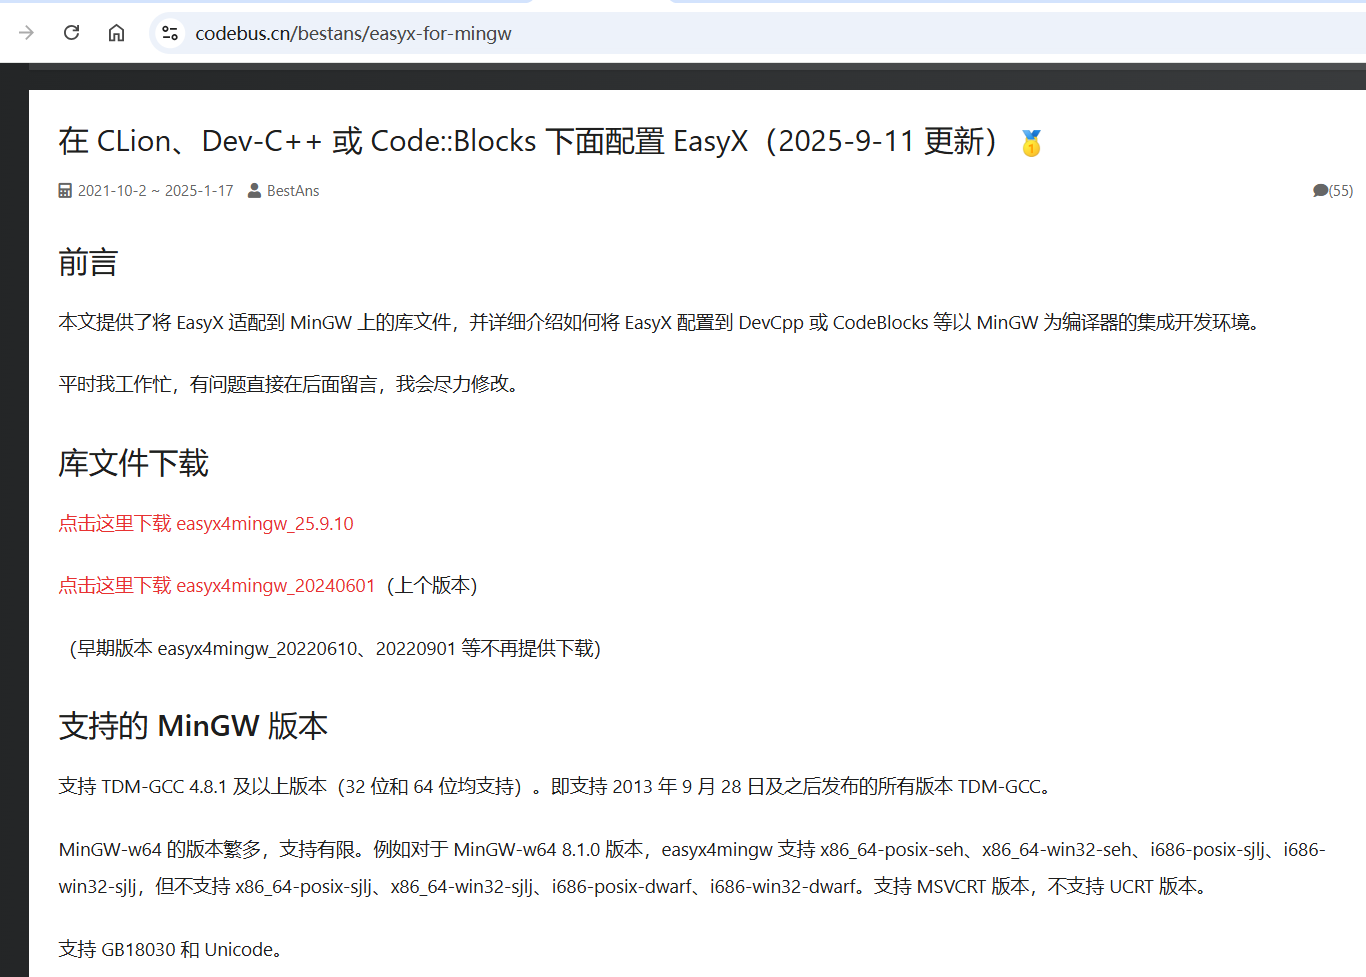
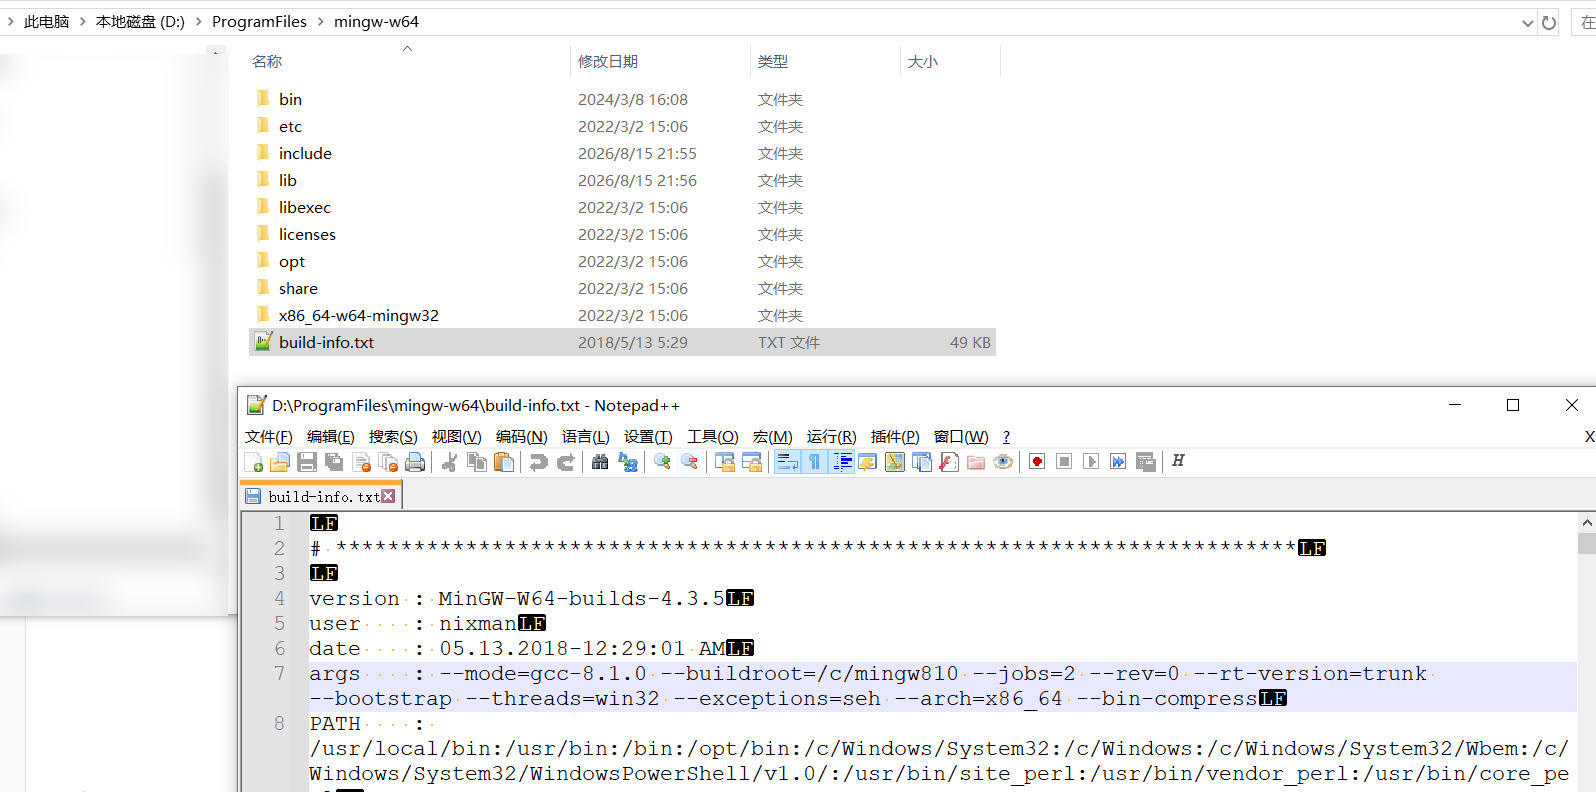
我的mingw-w64安装在D:\ProgramFiles\mingw-w64 目录下:
8.2 头文件和库文件配置
从https://easyx.cn/download/easyx4mingw_20240601.zip 下载好EasyX 适配到 MinGW 上的库文件easyx4mingw_20240601.zip后,解压,包含以下文件:
1
2
3
4
5
6
7
| $ find easyx4mingw_20240601 -type f
easyx4mingw_20240601/include/easyx.h
easyx4mingw_20240601/include/graphics.h
easyx4mingw_20240601/lib-for-devcpp_5.4.0/libeasyx.a
easyx4mingw_20240601/lib32/libeasyx.a
easyx4mingw_20240601/lib64/libeasyx.a
easyx4mingw_20240601/readme.txt
|
- 将
easyx4mingw_20240601/include/目录下的2个头文件复制到D:\ProgramFiles\mingw-w64\x86_64-w64-mingw32\include目录下。注意不要复制错目录目录。 - 将
easyx4mingw_20240601/lib64/libeasyx.a库文件复制到D:\ProgramFiles\mingw-w64\x86_64-w64-mingw32\lib目录下。注意不要复制错目录目录。
复制完成后,对比文件md5值:
1
2
3
4
5
| # easyx4mingw_20240601目录下
$ md5sum easyx4mingw_20240601/include/easyx.h easyx4mingw_20240601/include/graphics.h easyx4mingw_20240601/lib64/libeasyx.a
d6b8aff8a7953a248e91b0bdbdb0cf9f easyx4mingw_20240601/include/easyx.h
83c1c291da31fda7184479d3bcd934dd easyx4mingw_20240601/include/graphics.h
2e6205f030cadbde05b71e3990b02db1 easyx4mingw_20240601/lib64/libeasyx.a
|
mingw目录下:
1
2
3
4
5
6
| # x86_64-w64-mingw32目录下
$ md5sum x86_64-w64-mingw32/include/easyx.h x86_64-w64-mingw32/include/graphics.h x86_64-w64-mingw32/lib/libeasyx.a x86_64-w64-mingw32/lib/EasyXw.lib
d6b8aff8a7953a248e91b0bdbdb0cf9f x86_64-w64-mingw32/include/easyx.h
83c1c291da31fda7184479d3bcd934dd x86_64-w64-mingw32/include/graphics.h
2e6205f030cadbde05b71e3990b02db1 x86_64-w64-mingw32/lib/libeasyx.a
2e6205f030cadbde05b71e3990b02db1 x86_64-w64-mingw32/lib/EasyXw.lib
|
为了像使用Visual Studio 2022一样,导入库文件EasyXw.lib,复制了一份libeasyx.a重命名为EasyXw.lib,并放在x86_64-w64-mingw32/lib目录下。
8.3 vscode配置
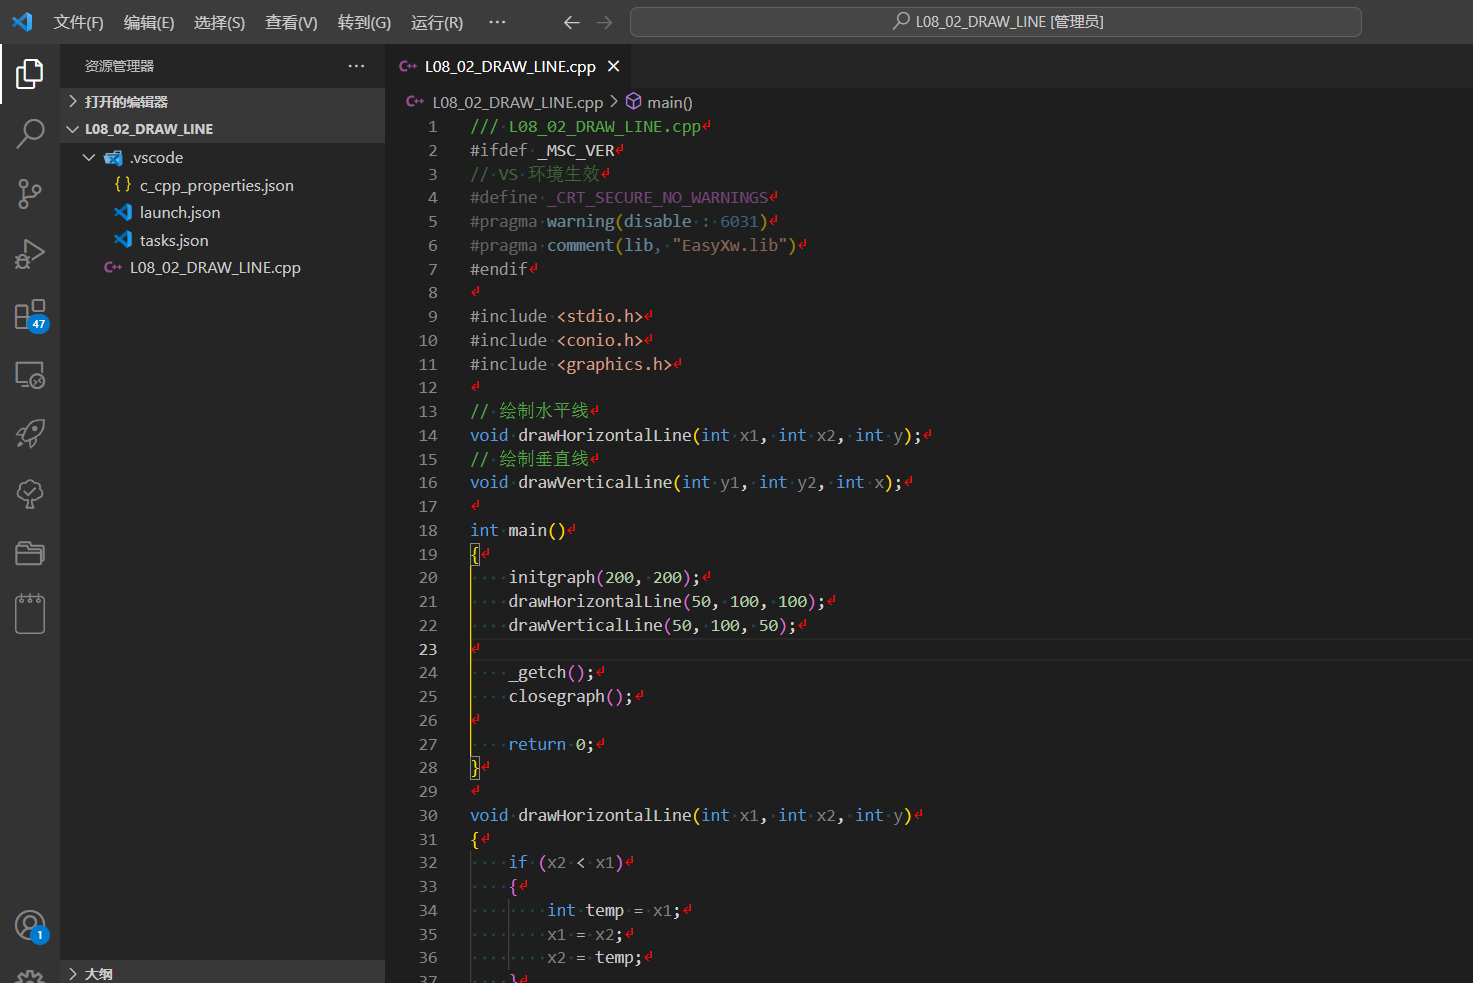
在D:\BC101\Examples\L08\L08_02_DRAW_LINE目录创建L08_02_DRAW_LINE.cpp文件,并使用vscode打开D:\BC101\Examples\L08\L08_02_DRAW_LINE目录,然后创建相关配置文件。
L08_02_DRAW_LINE.cpp文件内容如下:
 1
 2
 3
 4
 5
 6
 7
 8
 9
10
11
12
13
14
15
16
17
18
19
20
21
22
23
24
25
26
27
28
29
30
31
32
33
34
35
36
37
38
39
40
41
42
43
44
45
46
47
48
49
50
51
52
53
54
55
56
| /// L08_02_DRAW_LINE.cpp
#ifdef _MSC_VER
// VS 环境生效
#define _CRT_SECURE_NO_WARNINGS
#pragma warning(disable : 6031)
#pragma comment(lib, "EasyXw.lib")
#endif
#include <stdio.h>
#include <conio.h>
#include <graphics.h>
// 绘制水平线
void drawHorizontalLine(int x1, int x2, int y);
// 绘制垂直线
void drawVerticalLine(int y1, int y2, int x);
int main()
{
initgraph(200, 200);
drawHorizontalLine(50, 100, 100);
drawVerticalLine(50, 100, 50);
_getch();
closegraph();
return 0;
}
void drawHorizontalLine(int x1, int x2, int y)
{
if (x2 < x1)
{
int temp = x1;
x1 = x2;
x2 = temp;
}
for (int x = x1; x <= x2; x++)
{
putpixel(x, y, 16777215);
}
}
void drawVerticalLine(int y1, int y2, int x)
{
if (y2 < y1)
{
int temp = y1;
y1 = y2;
y2 = temp;
}
for (int y = y1; y <= y2; y++)
{
putpixel(x, y, 16777215);
}
}
|
然后依次创建三个文件:
- c_cpp_properties.json 作用:IDE 智能提示、头文件检索
- tasks.json 作用:调用 g++ 编译生成 exe
- launch.json 作用:gdb 调试运行 exe
c_cpp_properties.json内容如下:
 1
 2
 3
 4
 5
 6
 7
 8
 9
10
11
12
13
14
15
16
17
18
19
20
21
| {
"configurations": [
{
"name": "Win32",
"includePath": [
"${workspaceFolder}/**",
"D:\\ProgramFiles\\mingw-w64\\x86_64-w64-mingw32\\include"
],
"defines": [
"_DEBUG",
"UNICODE",
"_UNICODE"
],
"compilerPath": "D:\\ProgramFiles\\mingw-w64\\bin\\gcc.exe",
"cStandard": "gnu17",
"cppStandard": "gnu++14",
"intelliSenseMode": "windows-gcc-x64"
}
],
"version": 4
}
|
tasks.json内容如下:
 1
 2
 3
 4
 5
 6
 7
 8
 9
10
11
12
13
14
15
16
17
18
19
20
21
22
23
24
25
26
27
28
29
| {
"version": "2.0.0",
"tasks": [
{
"label": "build_easyx",
"type": "process",
"command": "D:\\ProgramFiles\\mingw-w64\\bin\\g++.exe",
"args": [
"-g",
"L09_02_DRAW_LINE.cpp",
"-lEasyX",
"-lgdi32",
"-limm32",
"-lole32",
"-luuid",
"-o",
"D:\\BC101\\Examples\\Debug\\L08_02_DRAW_LINE.exe"
],
"options": {
"cwd": "D:\\BC101\\Examples\\L08\\L08_02_DRAW_LINE"
},
"group": {
"kind": "build",
"isDefault": true
},
"problemMatcher": "$gcc"
}
]
}
|
launch.json文件内容如下:
 1
 2
 3
 4
 5
 6
 7
 8
 9
10
11
12
13
14
15
16
17
18
| {
"version": "0.2.0",
"configurations": [
{
"name": "debug easyx",
"type": "cppdbg",
"request": "launch",
"program": "D:\\BC101\\Examples\\Debug\\L08_02_DRAW_LINE.exe",
"args": [],
"stopAtEntry": false,
"cwd": "D:\\BC101\\Examples\\L08\\L08_02_DRAW_LINE",
"environment": [],
"MIMode": "gdb",
"miDebuggerPath": "D:\\ProgramFiles\\mingw-w64\\bin\\gdb.exe",
"preLaunchTask": "build_easyx"
}
]
}
|
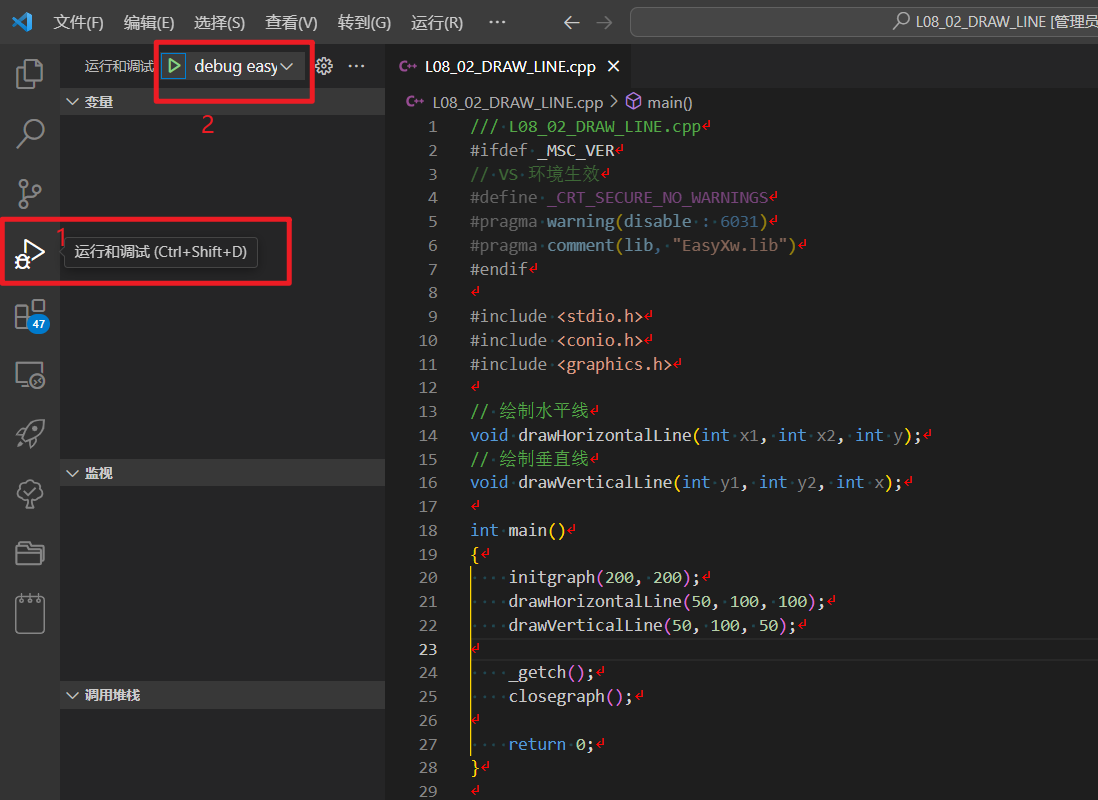
然后,就可以运行代码了:
点击【运行和调试】图标,然后点击上方的绿色的"debug easyx"开始图标:
就会开始调试代码,并运行代码:
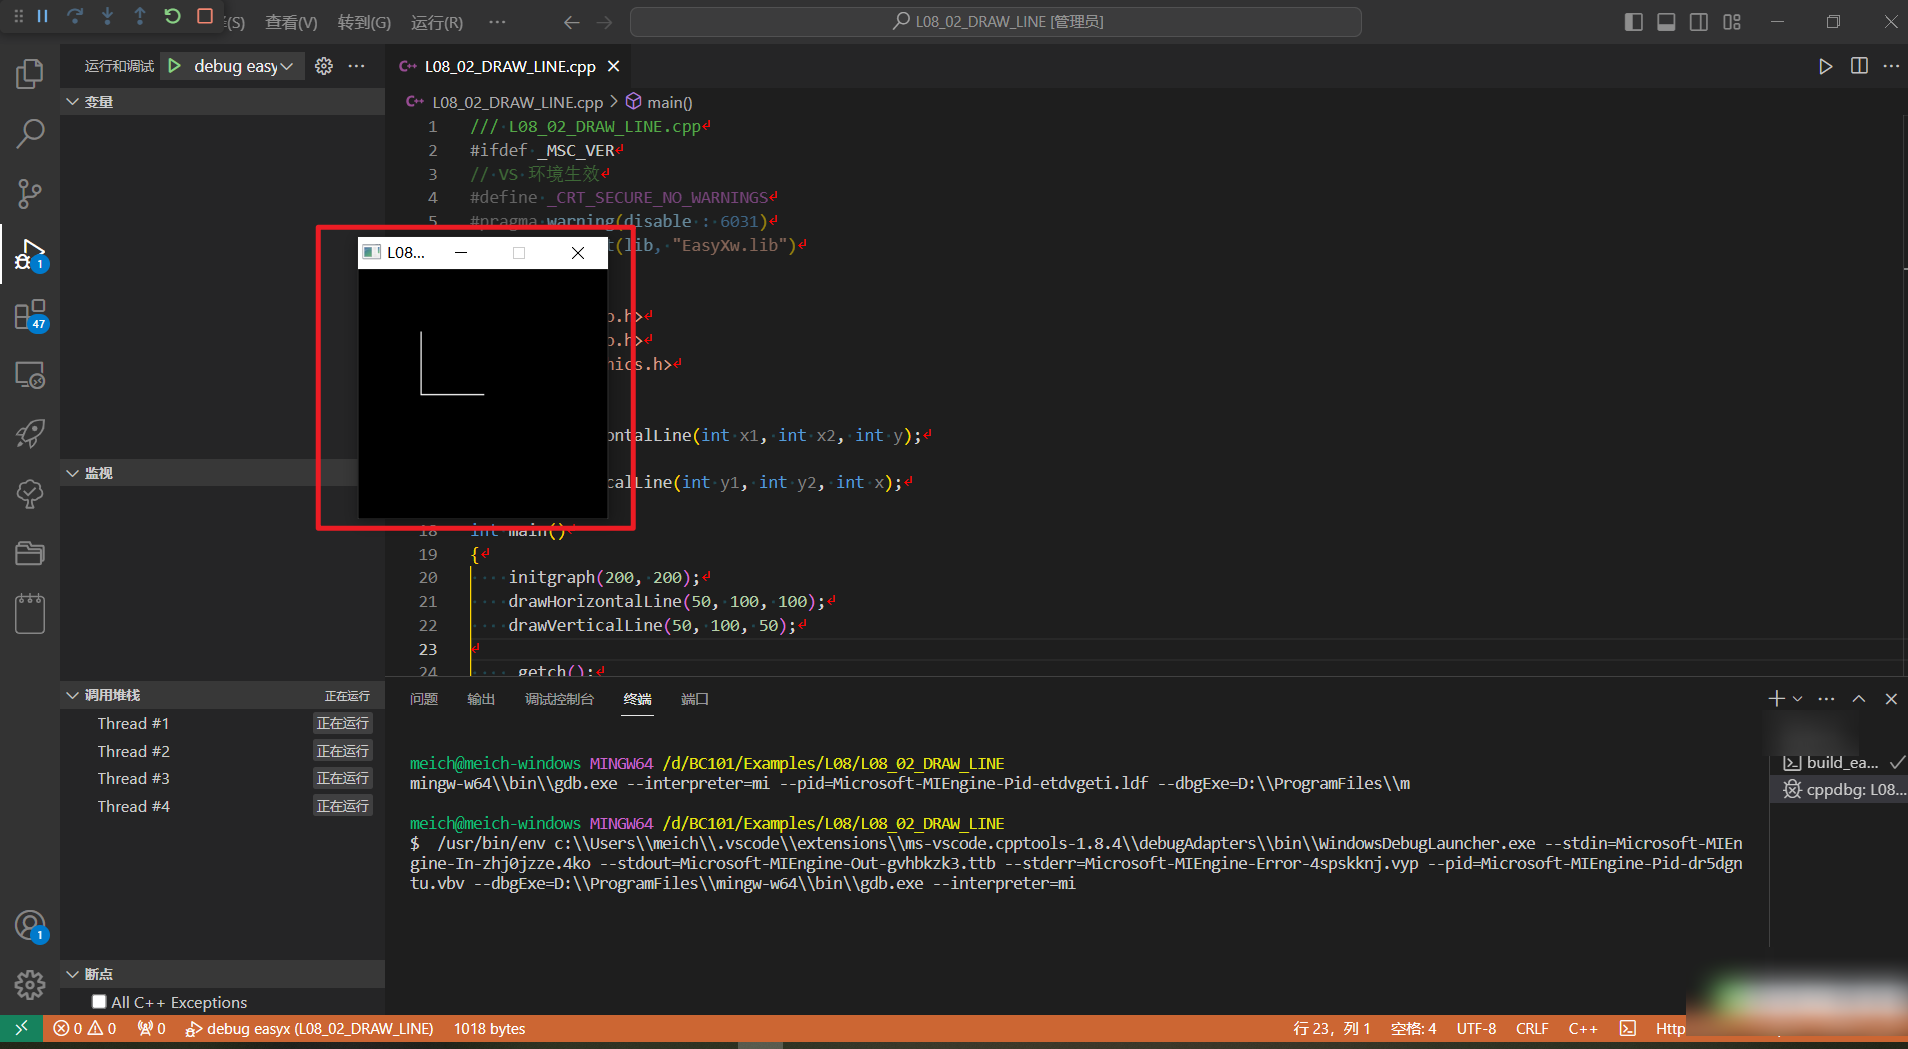
可以看到,能够正常的执行程序,绘制出了图形!!说明通过vscode也能正常使用easyx库绘制图形!
8.4 创建自动化复制程序
其他的项目也是存放在 D:\BC101\Examples目录下,也是按章节分子目录,因此可以创建一个Python自动化程序,有新项目时运行该程序自动帮我复制相关配置文件,并进行替换,避免使用手动操作。
create_from_template.py存放在D:\BC101\Examples目录下,其内容如下:
 1
 2
 3
 4
 5
 6
 7
 8
 9
10
11
12
13
14
15
16
17
18
19
20
21
22
23
24
25
26
27
28
29
30
31
32
33
34
35
36
37
38
39
40
41
42
43
44
45
46
47
48
49
50
51
52
53
54
55
56
57
58
59
60
61
62
63
64
65
66
67
68
69
70
71
72
| import os
import shutil
# ==========配置区==========
BASE_DIR = r"D:\BC101\Examples"
# 模板章节
TEMPLATE_CHAPTER = "L08"
# 模板项目名称
TEMPLATE_PROJECT = "L08_02_DRAW_LINE"
# 模板完整路径
SRC_TEMPLATE = os.path.join(BASE_DIR, TEMPLATE_CHAPTER, TEMPLATE_PROJECT)
PLACEHOLDER = TEMPLATE_PROJECT
def main():
new_proj = input("输入新项目名称(例:L09_01_DRAW_LINE): ").strip()
if not new_proj:
print("项目名不能为空")
return
# 按下划线分割,取第一段作为外层目录,兼容 L100_01_XXX
parts = new_proj.split("_", 1)
if len(parts) < 2:
print("项目名称格式错误,示例:L09_01_DRAW_LINE,需要包含下划线")
return
outer_dir = parts[0]
src = SRC_TEMPLATE
outer_path = os.path.join(BASE_DIR, outer_dir)
dst = os.path.join(outer_path, new_proj)
if not os.path.isdir(src):
print(f"模板目录不存在: {src}")
return
if os.path.exists(dst):
print(f"目标项目已存在: {dst}")
return
# 创建外层Lxx目录(不存在则新建)
os.makedirs(outer_path, exist_ok=True)
# 复制整个模板目录
shutil.copytree(src, dst)
# 章节字符处理
old_chapter_part = f"\\\\{TEMPLATE_CHAPTER}\\\\"
new_chapter_part = f"\\\\{outer_dir}\\\\"
# 遍历全部json/cpp文件,替换占位符
for root, dirs, files in os.walk(dst):
for filename in files:
filepath = os.path.join(root, filename)
if filename.lower().endswith((".json", ".cpp")):
with open(filepath, "r", encoding="utf-8") as f:
text = f.read()
text = text.replace(PLACEHOLDER, new_proj).replace(old_chapter_part, new_chapter_part )
with open(filepath, "w", encoding="utf-8") as f:
f.write(text)
# 重命名cpp文件
old_cpp = os.path.join(dst, f"{PLACEHOLDER}.cpp")
new_cpp = os.path.join(dst, f"{new_proj}.cpp")
if os.path.exists(old_cpp):
os.rename(old_cpp, new_cpp)
print("创建完成")
print(f"源模板: {src}")
print(f"外层目录: {outer_path}")
print(f"新项目: {dst}")
print(f"源码文件: {new_cpp}")
if __name__ == "__main__":
main()
|
然后,在命令行执行脚本:
1
2
3
4
5
6
7
8
9
| D:\BC101\Examples>python create_from_template.py
输入新项目名称(例:L09_01_DRAW_LINE): L09_02_DRAW_LINE
创建完成
源模板: D:\BC101\Examples\L08\L08_02_DRAW_LINE
外层目录: D:\BC101\Examples\L09
新项目: D:\BC101\Examples\L09\L09_02_DRAW_LINE
源码文件: D:\BC101\Examples\L09\L09_02_DRAW_LINE\L09_02_DRAW_LINE.cpp
D:\BC101\Examples>
|
将新复制的代码中白色颜色代码数字16777215替换成RED宏,然后用beyond compare对比文件夹:

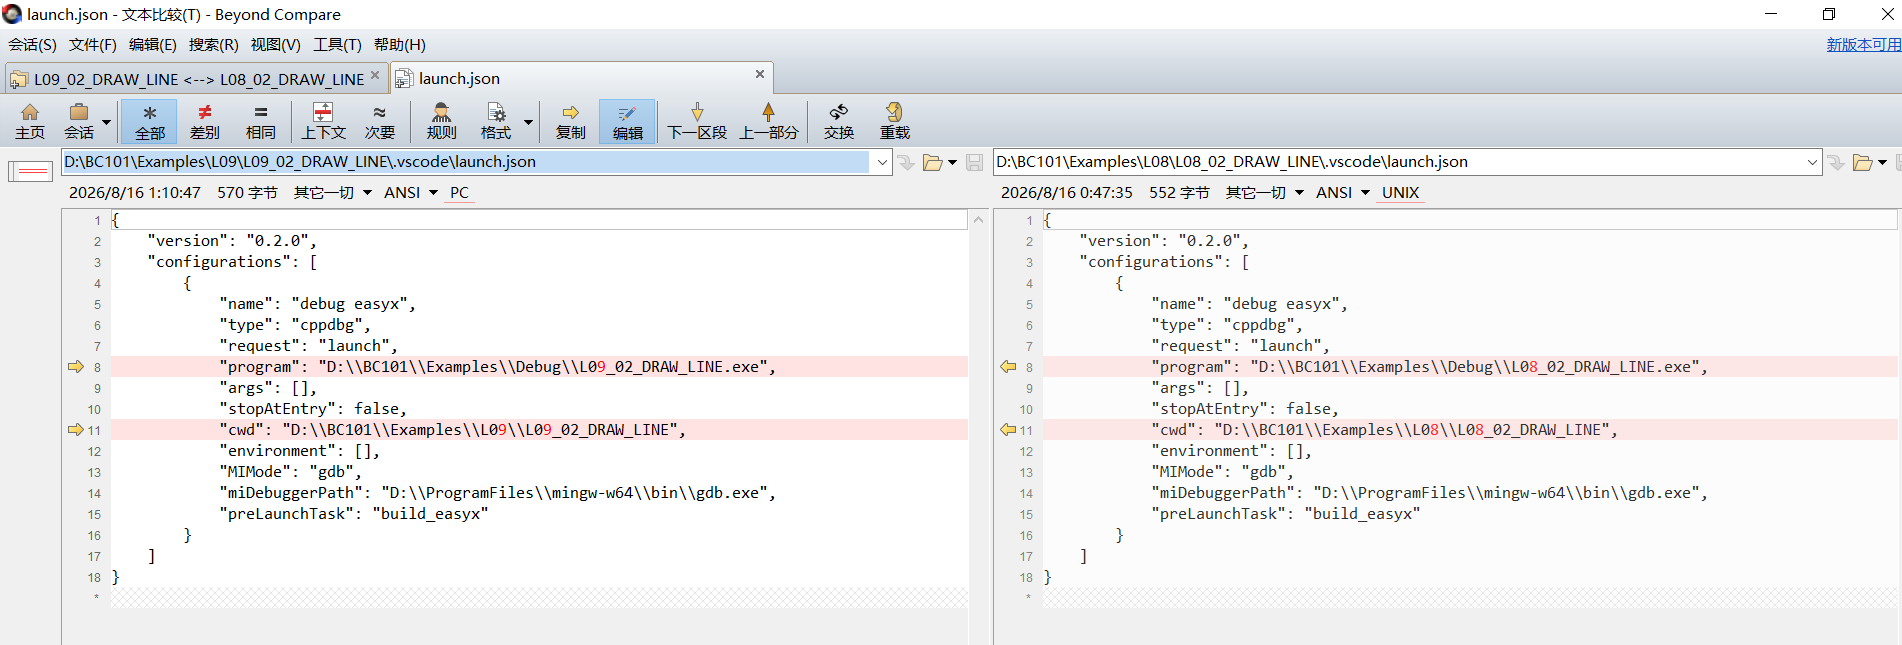
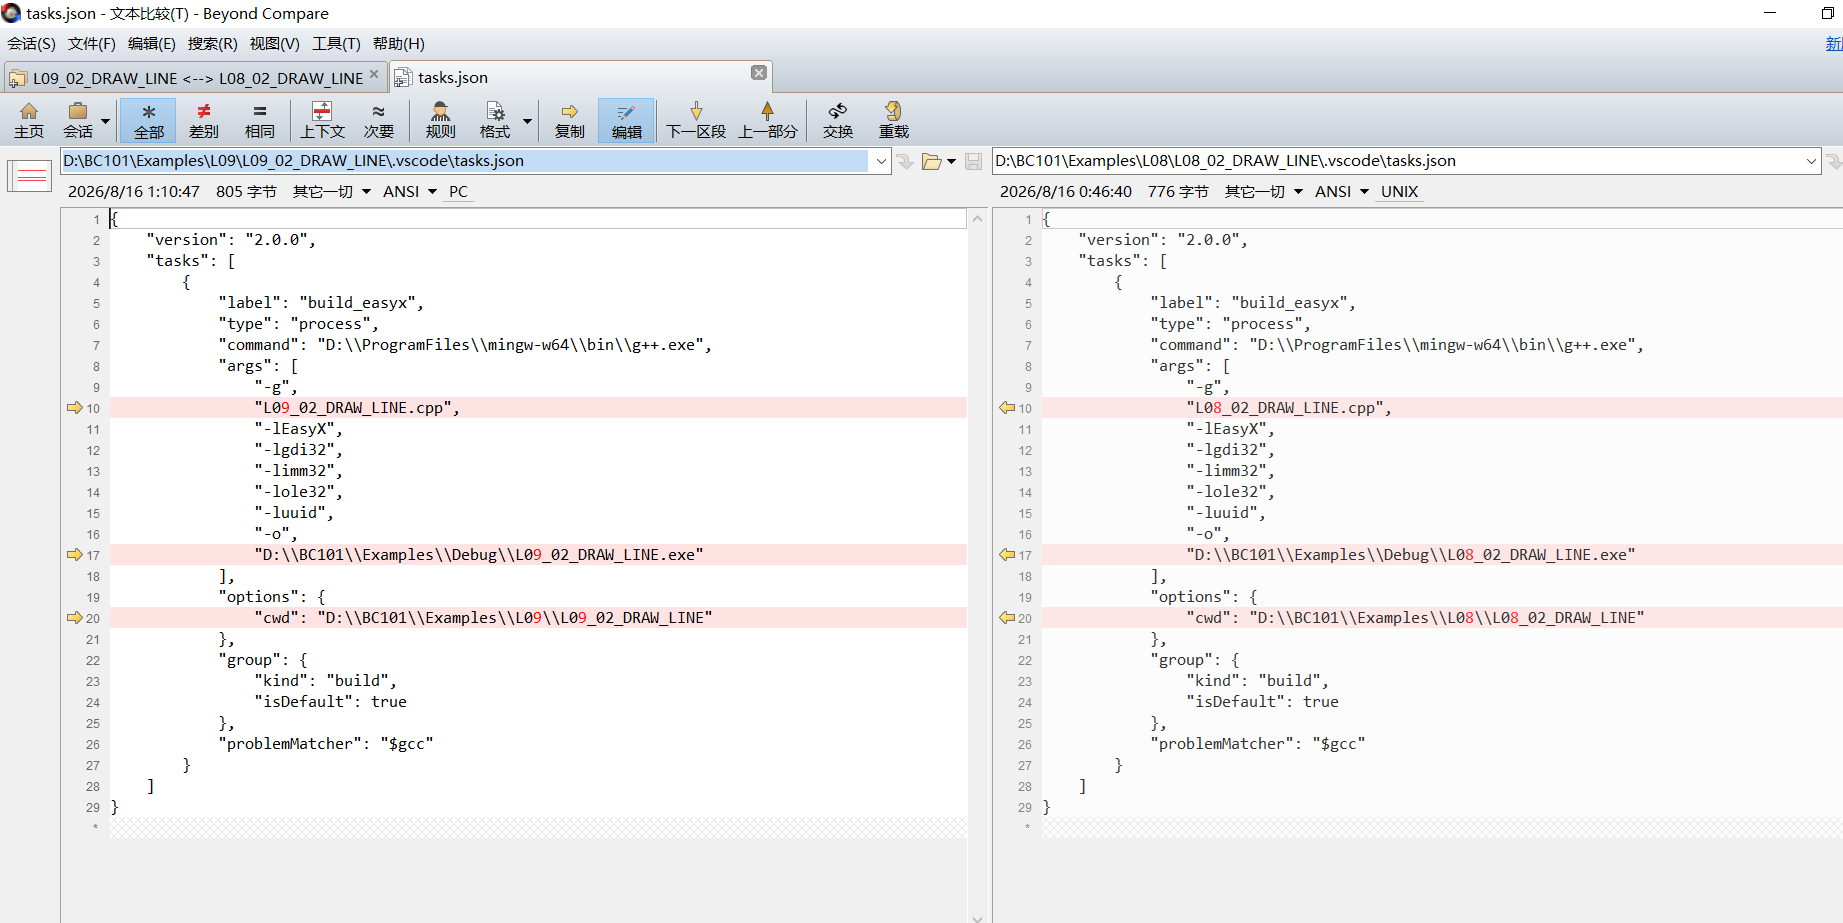
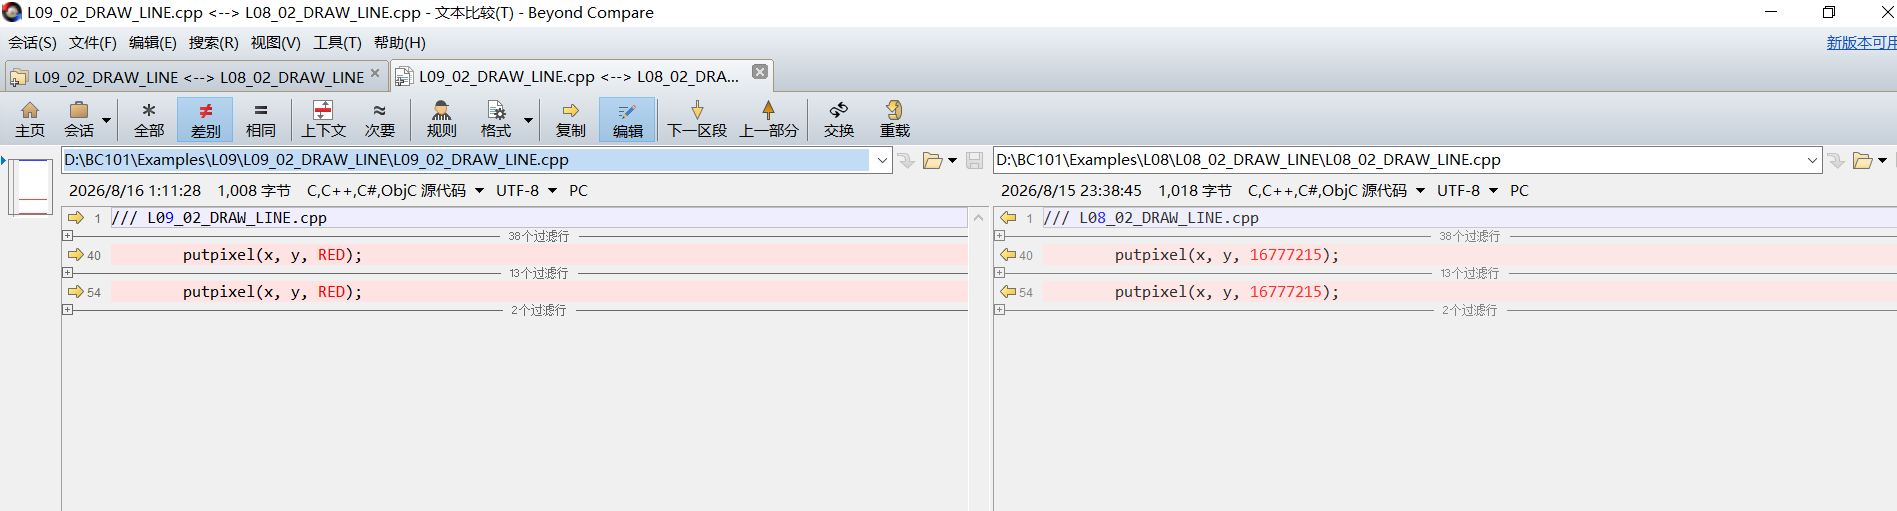
可以看到,自动帮创建了目录,并且也替换了项目名称相关的字符!说明自动化程序工作正常!
然后再用vscode打开这个新的项目,看能不能运行:
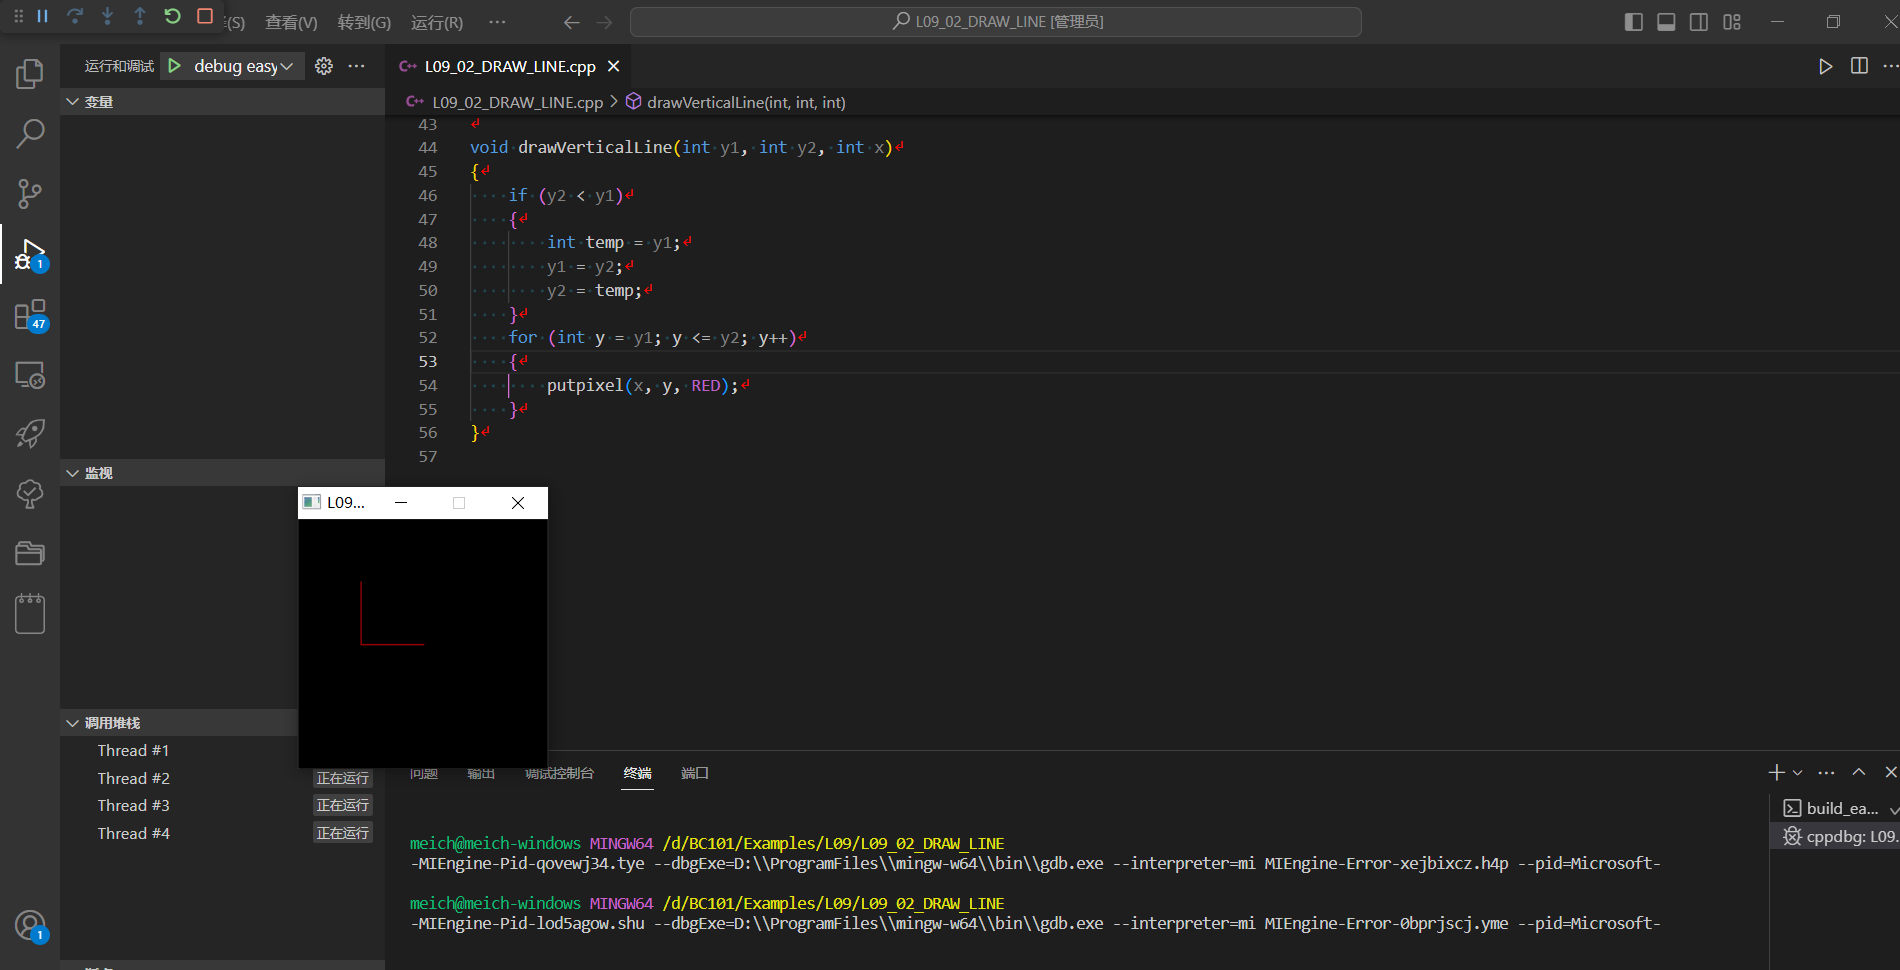
也能正常绘图,并且水平线和垂直线都变成了红色的,说明新项目代码是正常的!!!